-
Timeless Classics
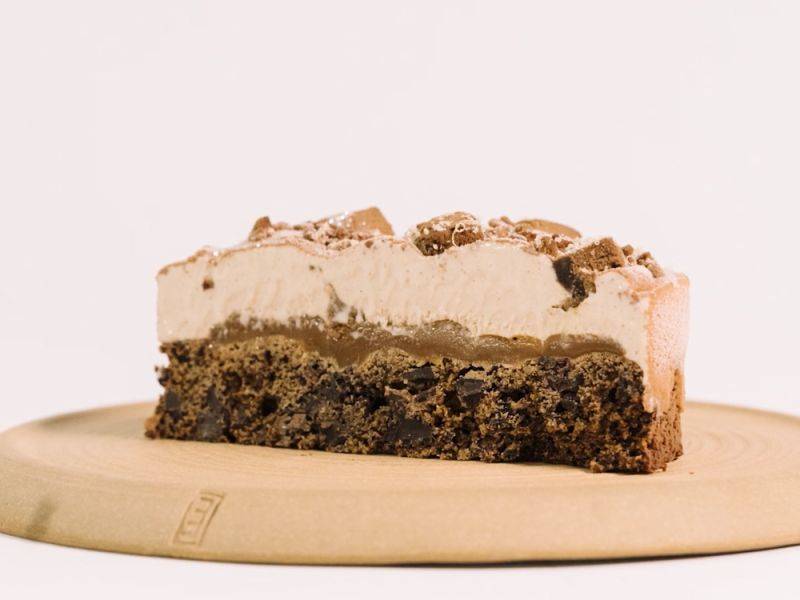
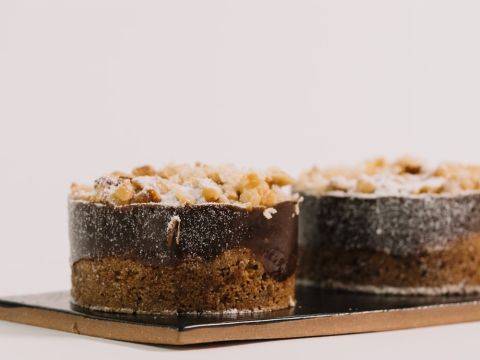
Revisit the classic cookie with this cookie tart made with ice cream. You'll learn how to make a praliné cookie base with a praliné ice cream. There are also chewy bites of brownie inside the tart as well as a tonka caramel and caramelized cocoa nibs.Revisit the classic cookie with this cookie tart made with ice cream. You'll learn how to make a praliné cookie base with a praliné ice cream. There are also chewy bites of brownie inside the tart as well as a tonka caramel and caramelized cocoa nibs.Revisit the classic cookie with this cookie tart made with ice cream. You'll learn how to make a praliné cookie base wit...
- Shelf life:
- 2 Months
- Conservation:
- Frozen at -20°C or colder
Containing: 6 Components
Praliné Cookie
Ingredients: Praliné Cookie
-
7.2 ozsoft butter
-
1.2 ozinverted sugar
-
4.4 ozMuscovado sugar
-
0.3 ozMaldon sea salt flakes
-
9.4 ozAll purpose flour
-
3.8 ozEggs, whole
-
0.3 ozbaking soda
Preparation: Praliné Cookie
- Cream the butter, inverted sugar and praliné together in the mixer.
- Once the mix is homogenous, add the muscovado sugar and maldon salt. Mix well and add 25% of the flour. Mix for about 2 minutes.
- Make sure the eggs are at 22°-23°C (72°-74°F).
- After 2 minutes of mixing, add the eggs gradually and mix well after each addition.
- Add the remaining flour and baking soda and mix until just blended.
- Add the chopped chocolate and mix well.
- Place the dough in a bowl, cover with plastic film making sure the plastic film touches the entire surface of the batter.
- Allow to set in the refrigerator for 4-6 hours.
- Once the dough is set, portion 150g (5.3oz) of batter and press inside a greased 12 cm (4.7") metal ring on a silpat.
- Bake at 160°C (320°F) for about 15 minutes or until the internal temperature reaches a minimum of 93°C (199°F) and a maximum of 95°C (203°F).
- Let the cookies cool in the mold for a few minutes before unmolding them. Run a small paring knife around the rim and remove the ring. Let the cookies cool completely at room temperature until needed.
Tools
- Metal Tray
- Bowl(s)
- Gloves
- Mixing bowl (s)
- Plastic film
- Scale
- Infrared Thermometer
- Small paring knife
- Silpat (s)
- Tabletop mixer, mixing bowl and a paddle attachment
- Spatula(s)
- 12 cm (4.7") metal ring
Hazelnut Ice Cream
Ingredients: Hazelnut Ice Cream
-
1.2 lbWhole milk
-
5.6 ozHeavy cream, 35% fat
-
1.4 ozinverted sugar
-
4.6 ozdextrose
-
3.5 ozsucrose
-
2.3 oztrehalose
-
0.2 ozice cream stabiliser
-
0.2 ozMono diglyceride emulsifier
-
0.1 ozMaldon sea salt flakes
Preparation: Hazelnut Ice Cream
- Place the milk and the cream in a saucepan and bring to a temperature of 40°C-50°C (104°F-122°F).
- In the meantime, mix all the dry ingredients together except for the inverted sugar. Mix well to dilute the emulsifier and stabilizer.
- Make a well and place the inverted sugar in the center.
- Once the right temperature is reached, add the sugars to the cream gradually and incorporate well after each addition.
- Cook the ice cream base to 85°C (185°F).
- Pour the hot cream base in a container and add the hazelnut praliné paste.
- Blend with an immersion blender for one to two minutes to homogenize.
- Cool down as quickly as possible to 4°C (39°F) and allow to mature overnight in the refrigerator.
- Once matured, blend the ice cream base with an immersion blender to ensure it is well homogenized.
- Place the ice cream base in the machine and churn.
- Once churned, place the ice cream in the freezer for a few minutes before using.
Tools
- Cooktop
- Saucepan
- Tall recipient
- Immersion blender
- Bowl(s)
- Infrared Thermometer
- Ice-cream machine or Pacojet
Caramelized Cocoa Nibs
Ingredients: Caramelized Cocoa Nibs
-
0.5 ozwater
-
1.6 ozsucrose
Preparation: Caramelized Cocoa Nibs
- Put the water and sucrose in a pan and heat until the temperature reaches 118°C (244°F).
- Turn off the heat and add the nibs.
- Mix until the sugar becomes dry and crystallized.
- Turn the heat back on to melt the sugar and caramelize.
- Once caramelized, turn off the heat and add the cocoa butter and mix well.
- Spread the nibs on a silpat and let them cool at room temperature.
- Store in an air tight container until ready to use.
Tools
- Cooktop
- Saucepan
- Bowl(s)
- Silpat (s)
- Spatula(s)
Tonka Caramel
Ingredients: Tonka Caramel
-
4.4 ozHeavy cream, 35% fat
-
1.1 ozinverted sugar
-
15.4 grMaldon sea salt flakes
-
1.1 ozsweetened condensed milk
-
2.1 ozglucose syrup
-
15.4 grTonka beans
-
0.9 ozliquid sorbitol
-
3.5 ozsucrose
-
2.8 ozbutter
-
0.1 ozSoy lecithin, liquid
-
Q.S.Tonka bean essence
Preparation: Tonka Caramel
- Place the cream, condensed milk, glucose, inverted sugar and salt in a pan.
- With a microplane, shave the tonka bean into the pan.
- Bring to a simmer and remove from the heat. Reserve.
- Put the sorbitol in another pan and melt.
- As soon as it melts, add the sucrose gradually and let melt after each addition. Let it caramelize to a light color.
- Turn off the heat and gradually add the warm cream, whisking well after each addition.
- Once the cream is incorporated, turn the heat back on and add the butter.
- Whisk constantly until the butter is melted.
- Pour into a tall recipient and let it cool down to 80°C (176°F).
- Add the lecithin and a few drops of tonka bean essence to your liking.
- Blend with an immersion blender until well emulsified.
- Cover with plastic film making sure the film touches the entire surface of the caramel.
- Reserve in the refrigerator.
Tools
- Cooktop
- Whisk
- Tall recipient
- Immersion blender
- Bowl(s)
- Mixing bowl (s)
- Plastic film
- Infrared Thermometer
- Saucepans
- Microplane
- Spatula(s)
Chewy Brownie
Ingredients: Chewy Brownie
-
3.8 ozsoft butter
-
10.3 ozsucrose
-
0.3 ozMaldon sea salt flakes
-
3.8 ozglucose syrup
-
5.1 ozAll purpose flour
-
5.1 ozEggs, whole
-
0.3 ozvanilla extract
Preparation: Chewy Brownie
- Cream the butter, sucrose, salt and 25% of the flour in the bowl of a mixer.
- Add the glucose syrup and mix well.
- Make sure the eggs are at 22°-23°C (72°-74°F) and mix with the vanilla.
- Add the eggs gradually and mix well after each addition
- Melt the cocoa paste and make sure it is at 50°C (122°F) before adding it to the bowl. Mix to combine.
- Add the remaining sifted flour at once and slowly combine.
- Put the batter in the mold and spread evenly. Tap the tray to remove any air bubbles.
- Bake at 160°C (320°F) for 8 to 12 minutes or until the internal temperature of the brownie reaches 92°C (198°F).
- Once the brownie is baked, let it cool and cut into small cubes. Reserve.
Tools
- Metal Tray
- Bowl(s)
- Offset spatula
- Infrared Thermometer
- Tabletop mixer, mixing bowl and a paddle attachment
- Spatula(s)
- 35cm (13.8")x 25cm (9.8")x 2cm(0.8") rectangular silicone mold
Assembly
Ingredients: Assembly
-
Q.S.IBC creative silver powder
-
1 beans(s)Tonka beans
Preparation: Assembly
- Secure the guitar sheet strips around the cooled cookies.
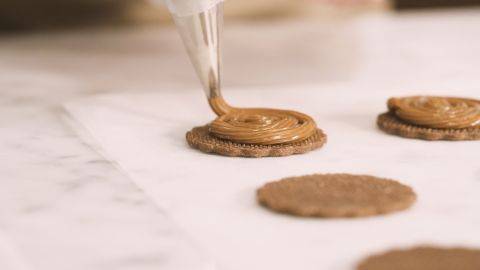
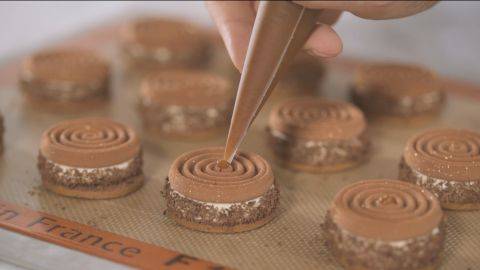
- Pipe concentric circles of tonka caramel on top of the cookies.
- Put the ice cream in a piping bag with a round nozzle.
- Fill the top of each cookie with ice cream.
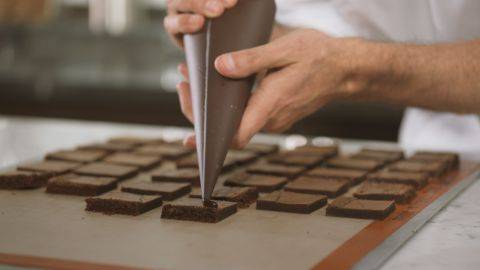
- Add dollops of caramel and praliné in the ice cream.
- Top with cubes of brownie and sprinkle with caramelized nibs.
- Place the cookies in the blast freezer until solid.
- Mix equal amounts of melted cocoa butter and melted chocolate.
- Make sure the temperature of this mix is between 35°-40°C (95°-104°F).
- Using a cutter, carefully remove the guitar strips from around the cookies.
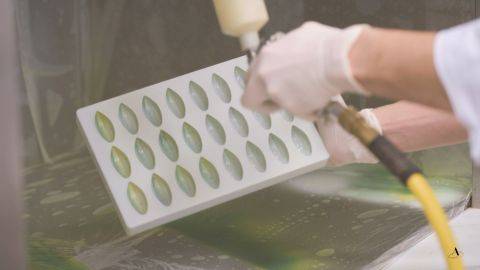
- Pour the chocolate and cocoa butter mix in a spray gun and spray the cookie tarts evenly.
- Place the cookies into the blast freezer until solid.
- To decorate, shave some tonka bean on top of the cookies and decorate with some silver flakes or powder.
- If desired, place a personalized stencil with your logo on it in the center of each cookie.
- Store the ice cream cookie tarts at -22°C (-7.6°F) and serve between -15°-16°C (-5.3°-2°F).
Tools
- Piping Bag
- Scissors
- Large offset spatula
- Microplane
- Cutter
- Guitar sheet strips
- Piping bag & round tip

Need support with your chocolate confections?
- Find troubleshooting guides & tutorials
- Chat live with an advisor chef and find the right solution to your challenges






Comments